Foolproof Oven Roasted Chicken: Moist, Tender, & Simple Steps for Culinary Success
Imagine a succulent, juicy whole chicken, its skin crackling with a perfect golden crisp, filling your home with an aroma that promises warmth and comfort. What if we told you that achieving this culinary masterpiece doesn't require a chef's pedigree or hours of laborious work? It's true! Mastering the art of a simple whole roasted chicken at home is far easier than you might think, delivering results that will consistently surpass any store-bought rotisserie bird. This isn't just a meal; it's an experience – a delicious, healthy comfort food that's within everyone's reach. Many find the idea of roasting a whole chicken daunting, envisioning complex trussing or fear of dry, flavorless meat. We’re here to demystify the process, breaking it down into straightforward steps that guarantee a moist interior, tender meat, and that coveted, irresistibly crispy skin. Prepare to impress yourself and your loved ones with a dish that’s both elegant and incredibly approachable.Why Homemade Roasted Chicken Trumps Store-Bought Every Time
While a store-bought rotisserie chicken offers convenience, it simply can't compete with the superior taste, texture, and control you get from a homemade roasted chicken. Here's why making your own is always the winning choice:- Unmatched Flavor: When you roast your own, you dictate the flavor profile. Infuse it with fresh lemons, aromatic garlic, and fragrant herbs like rosemary and thyme, allowing those wonderful flavors to permeate the meat from the inside out. You can personalize your seasoning blend to your exact preferences, something store-bought options can't offer.
- Superior Texture: Say goodbye to dry, stringy breast meat or rubbery skin. Our foolproof method ensures perfectly tender, juicy meat with skin that shatters with every bite.
- Healthier Choice: You control the ingredients, from the quality of the chicken to the type and amount of fats and seasonings used. No mysterious additives or excessive sodium – just pure, wholesome goodness.
- Cost-Effective: Buying a whole chicken and a few pantry staples is often more economical than regularly purchasing pre-cooked options.
- The Aroma Experience: There's nothing quite like the comforting scent of a roasting chicken filling your kitchen. It's an instant mood booster and a warm welcome home.
Essential Ingredients & Simple Prep for Your Perfect Roast
The beauty of a simple whole roasted chicken lies in its minimal ingredient list and straightforward preparation. You likely have most of what you need already!What You'll Need:
- Whole Chicken (4-5 lbs): This size is ideal for even cooking and usually takes around an hour. Look for a fresh, good quality bird.
- Aromatics:
- Lemons: Halved or quartered, stuffed into the cavity. They add brightness and help tenderize.
- Garlic: Several cloves, peeled and smashed, also for the cavity.
- Fresh Herbs: Sprigs of thyme, rosemary, or sage are fantastic. They infuse the chicken with an incredible fragrance and flavor.
- Fat: Melted Unsalted Butter or Olive Oil. This is crucial for achieving that golden, crispy skin.
- Seasoning Blend: This is where you can truly make it your own! A basic but effective blend includes:
- Kosher Salt & Freshly Ground Black Pepper: Essential for flavor.
- Paprika (sweet or smoked): Adds color and a subtle smoky depth.
- Garlic Powder & Onion Powder: Enhances savory notes.
- Dried Herbs: Italian seasoning blend is a great shortcut, or use individual dried thyme, oregano, or sage.
- Optional: Lemon Pepper Seasoning: For an extra zesty kick.
Key Equipment:
- Roasting Pan with a Rack: This is highly recommended. The rack elevates the chicken, allowing hot air to circulate all around it, ensuring crispy skin on the bottom as well as the top, and letting the juices drip away for gravy.
- Instant-Read Meat Thermometer: This is, without a doubt, your most important tool. Roasting by time alone is a gamble; roasting to temperature guarantees safety and perfect texture.
Simple Preparation Steps:
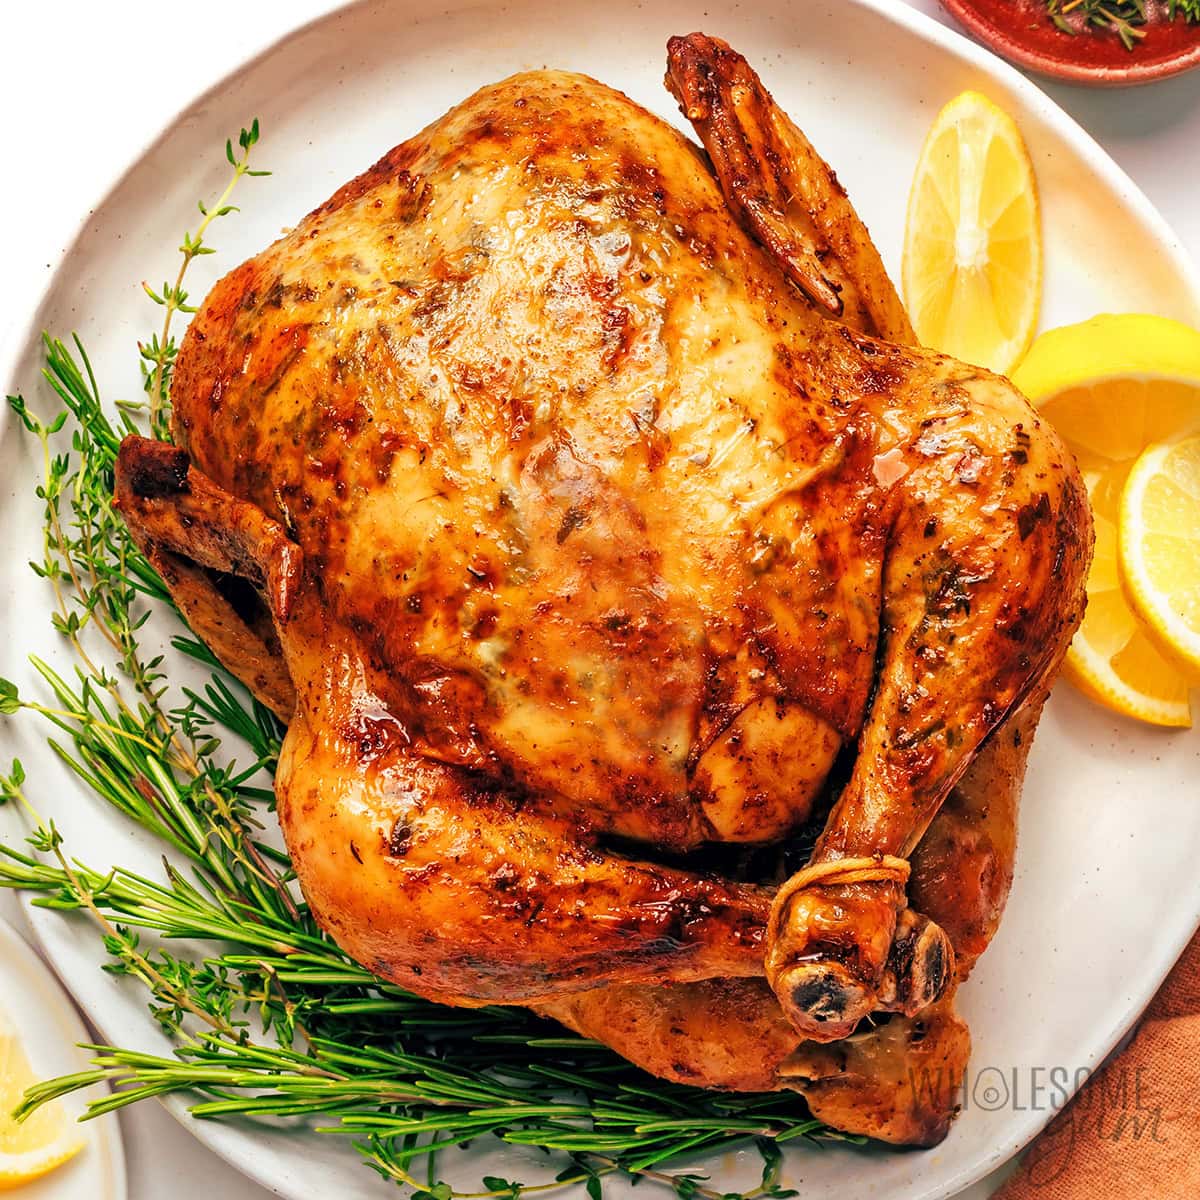
- Pat It Dry: This step is non-negotiable for crispy skin! Use paper towels to thoroughly pat the entire surface of the chicken dry, inside and out. Moisture is the enemy of crispiness.
- Stuff the Cavity: Place your halved lemons, smashed garlic cloves, and fresh herb sprigs inside the chicken's cavity. Don't pack it too tightly; you want air to circulate.
- Brush and Season Generously: Brush the melted butter or olive oil all over the chicken, ensuring every crevice is coated. Then, sprinkle your seasoning blend liberally over the entire bird, rubbing it in gently. Don't forget under the wings and legs!
- Optional Trussing: While not strictly necessary for cooking, tying the legs together with kitchen twine can help the chicken cook more evenly and makes for a more attractive presentation. However, if you're keeping it truly simple, feel free to skip this step entirely.
The Foolproof Roasting Method: Achieving Perfection Every Time
The secret to a consistently moist and tender chicken with beautifully crisp skin lies in two key factors: the right oven temperature and, most critically, cooking to the correct internal temperature, not just by time.Preheat & Roast High:
Preheat your oven to a robust 400-425°F (200-220°C). A higher initial temperature helps render the fat quickly, contributing to that glorious crispy skin.
The "Instant-Read Thermometer" Rule: Your Golden Standard
Forget guessing games or relying solely on cooking times listed in recipes. An instant-read thermometer is your best friend for perfectly cooked chicken.
- Target Temperature: The USDA recommends chicken reach an internal temperature of 165°F (74°C) for safety.
- Where to Check: Insert the thermometer into the thickest part of the thigh, avoiding the bone. For breast meat, check the thickest part of the breast. Dark meat (thighs and drumsticks) actually benefits from cooking to a slightly higher temperature, around 180-185°F (82-85°C), for optimal tenderness and texture, while breast meat is perfect at 165°F. Since you're cooking a whole bird, aim for at least 165°F in the breast and up to 180°F in the thigh.
- General Timing: A 4-pound chicken typically takes about 1 hour to 1 hour and 15 minutes at 400-425°F, but always let the thermometer be your guide.
The American Test Kitchen Pro-Tip for Ultimate Moisture (Optional but Recommended):
For an exceptionally moist chicken, here's a technique inspired by culinary experts:
- Roast the chicken in your preheated oven until its internal temperature reaches approximately 120-125°F (49-52°C) in the thickest part of the thigh. This usually takes about 25-30 minutes for a 4-pound bird.
- Turn off the oven completely.
- Leave the chicken inside the closed, turned-off oven for another 30-45 minutes. The residual heat will gently continue cooking the chicken, bringing it to the final target temperature of 165-180°F without drying it out. This slow, gentle finishing process results in incredibly tender meat.
The Crucial Resting Period:
Once your chicken reaches the desired internal temperature, remove it from the oven and transfer it to a cutting board. Tent it loosely with foil and let it rest for at least 10-15 minutes before carving. This resting period allows the juices to redistribute throughout the meat, ensuring every bite is succulent and flavorful. Skipping this step is a common mistake that leads to dry chicken!
For more detailed step-by-step guidance on consistent results, check out our article: Easy Roasted Whole Chicken: Crispy Skin, Juicy Meat Every Time.
Beyond the Bird: Easy Gravy & Serving Suggestions
A perfectly roasted chicken often leaves behind a treasure trove of flavorful pan drippings, which can be easily transformed into a delicious homemade gravy.Super-Simple Pan Gravy:
- After removing the chicken, place the roasting pan on the stovetop over medium heat (if it's stovetop-safe; if not, transfer drippings to a saucepan).
- Skim off most of the fat, leaving about 2 tablespoons of fat and the delicious brown bits at the bottom.
- Whisk in 2 tablespoons of all-purpose flour and cook for 1-2 minutes, stirring constantly, to create a roux.
- Gradually whisk in 1.5 to 2 cups of chicken broth, scraping up any browned bits from the bottom of the pan.
- Bring to a simmer, whisking until the gravy thickens. Season with salt and pepper to taste. For an extra rich flavor, you can add a splash of white wine or a pat of butter at the end.
Serving Suggestions:
A simple whole roasted chicken is incredibly versatile. Pair it with:
- Classic Sides: Creamy mashed potatoes, fluffy rice, or crispy roasted potatoes (you can even roast them alongside the chicken!).
- Roasted Vegetables: Carrots, onions, broccoli, or asparagus roasted with a drizzle of olive oil, salt, and pepper make excellent companions.
- Fresh Salads: A vibrant green salad with a light vinaigrette provides a refreshing contrast.
- Hearty Greens: Sautéed spinach, collard greens, or green beans with garlic.
Leftover Magic:
Don't let any scraps go to waste! Leftover roasted chicken is fantastic for:
- Sandwiches and wraps
- Chicken salad
- Tacos or quesadillas
- Soups and stews (use the carcass to make homemade chicken stock!)
